LinkedConnector Onboarding Guide - Start Here
The fastest way to set up LinkedConnector is with the onboarding Chrome extension. Install it once and it guides you through every step — from agency configuration to sub-account setup — in the right order, with videos and documentation at each stage.
How It Works
When you click a checklist item, it expands and shows a View Instructions button. Clicking this redirects you to the relevant page in LinkedConnector, where a video walkthrough appears alongside links to the full documentation. Once you've completed the task, click Completed and the extension moves you to the next step.
There are two stages:
- Agency setup — completed once for your agency account
- Sub-account setup — completed for each sub-account where LinkedConnector is installed
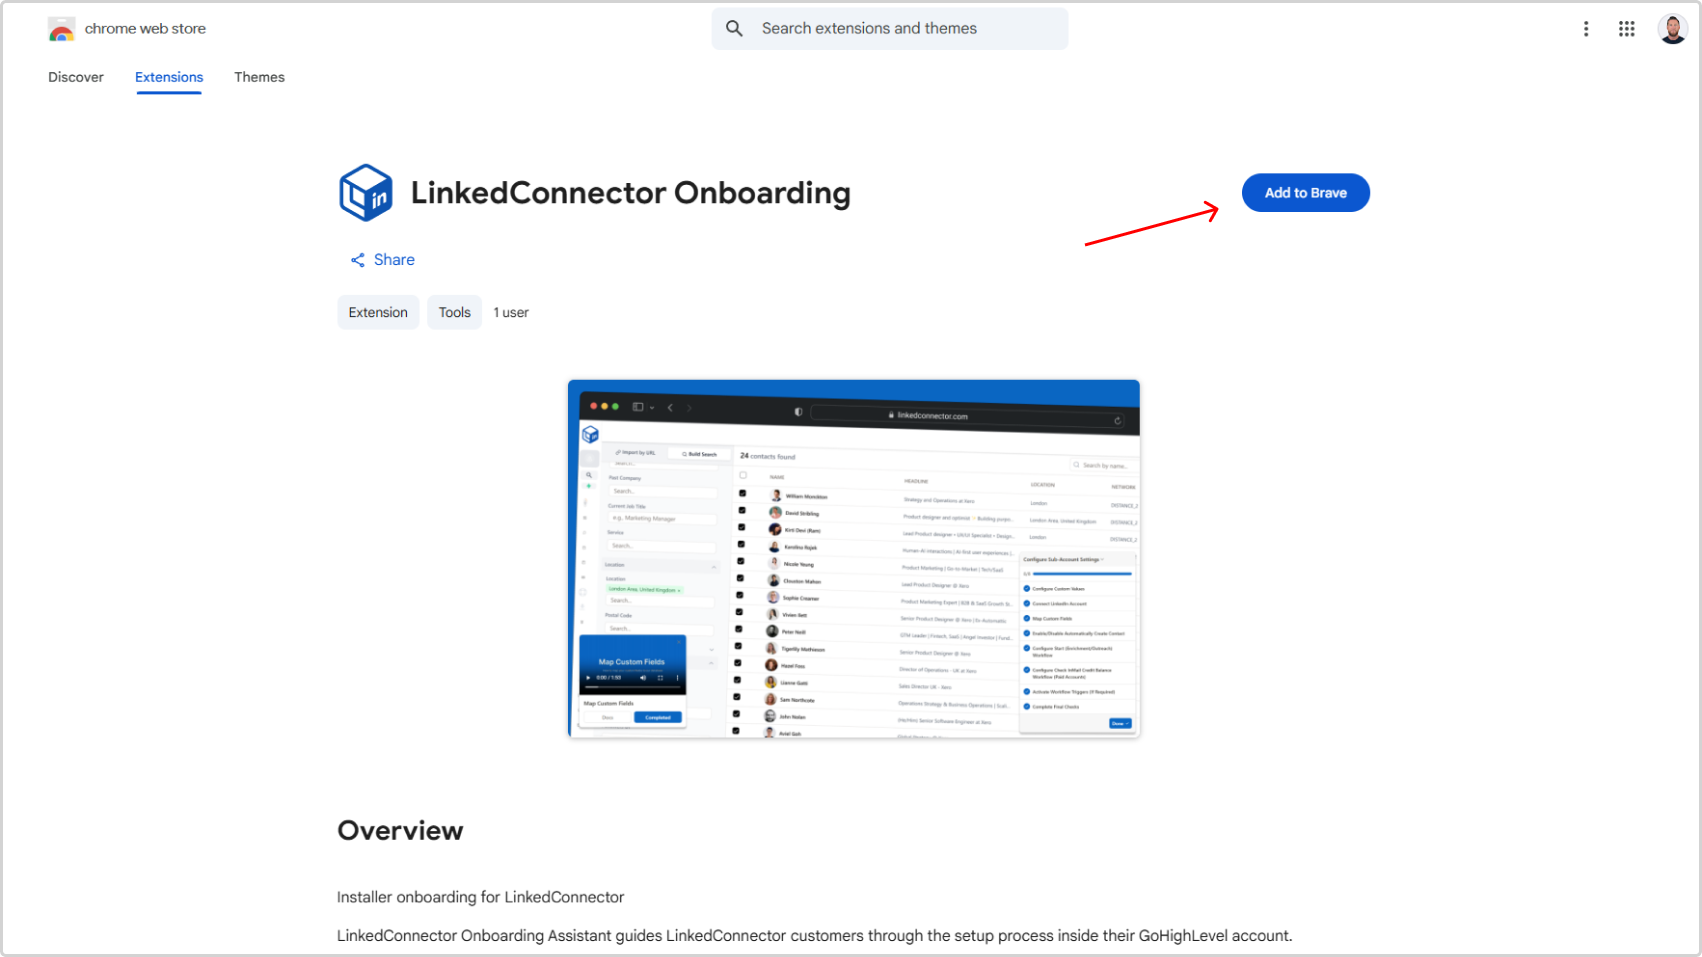
Step 1: Install the Chrome Extension
Install the LinkedConnector onboarding extension from the Chrome Web Store:
Install LinkedConnector Onboarding Extension
Once installed, open the extension from your browser toolbar.
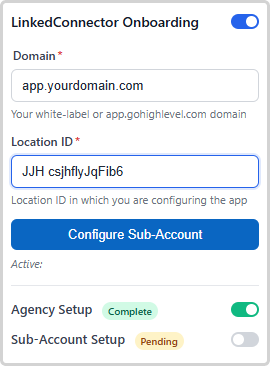
Step 2: Enter Your Domain and Location ID
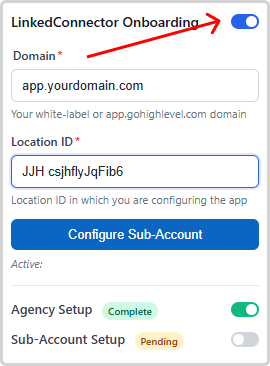
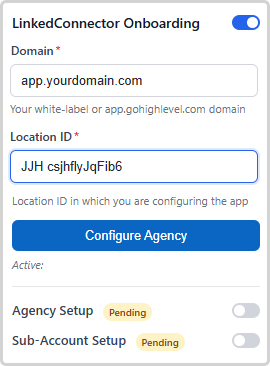
Inside the extension, enter two details:
- Domain — your white-label domain or the default domain. Example:
app.yourdomain.com - Location ID — the ID of the sub-account you are configuring
Where to find your Location ID: Open the sub-account in your browser. The Location ID appears in the URL:
https://yourdomain.com/v2/location/[LOCATION_ID]/

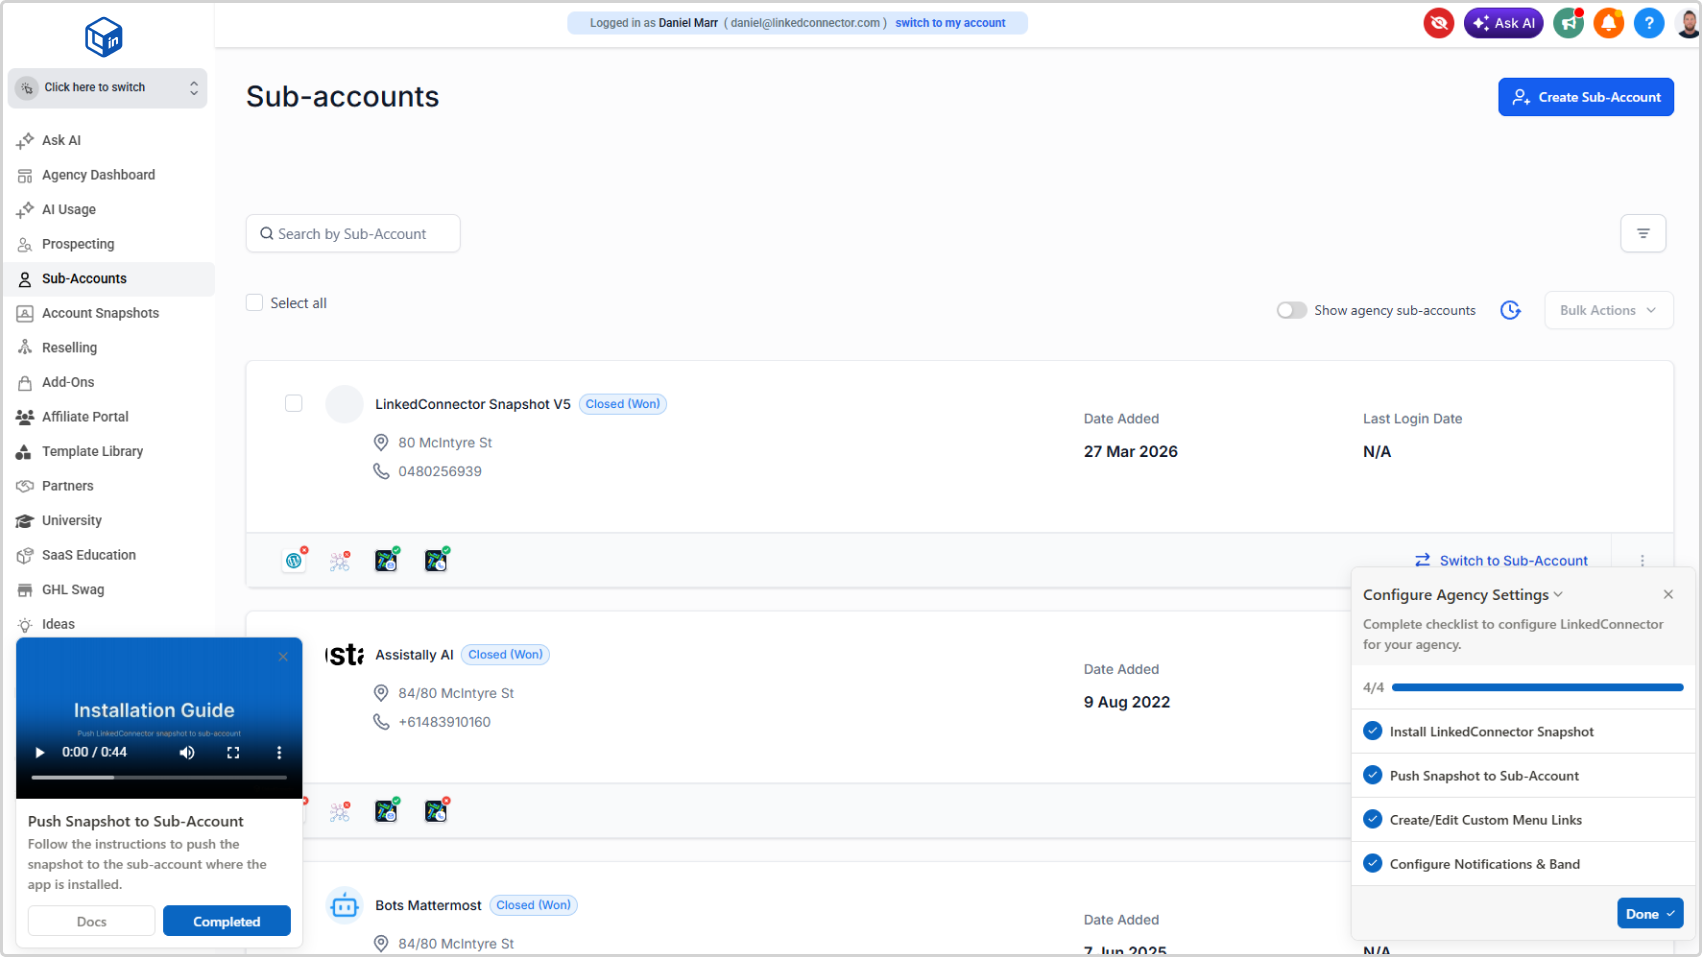
Step 3: Configure Your Agency
Click Configure Agency to begin the agency setup.
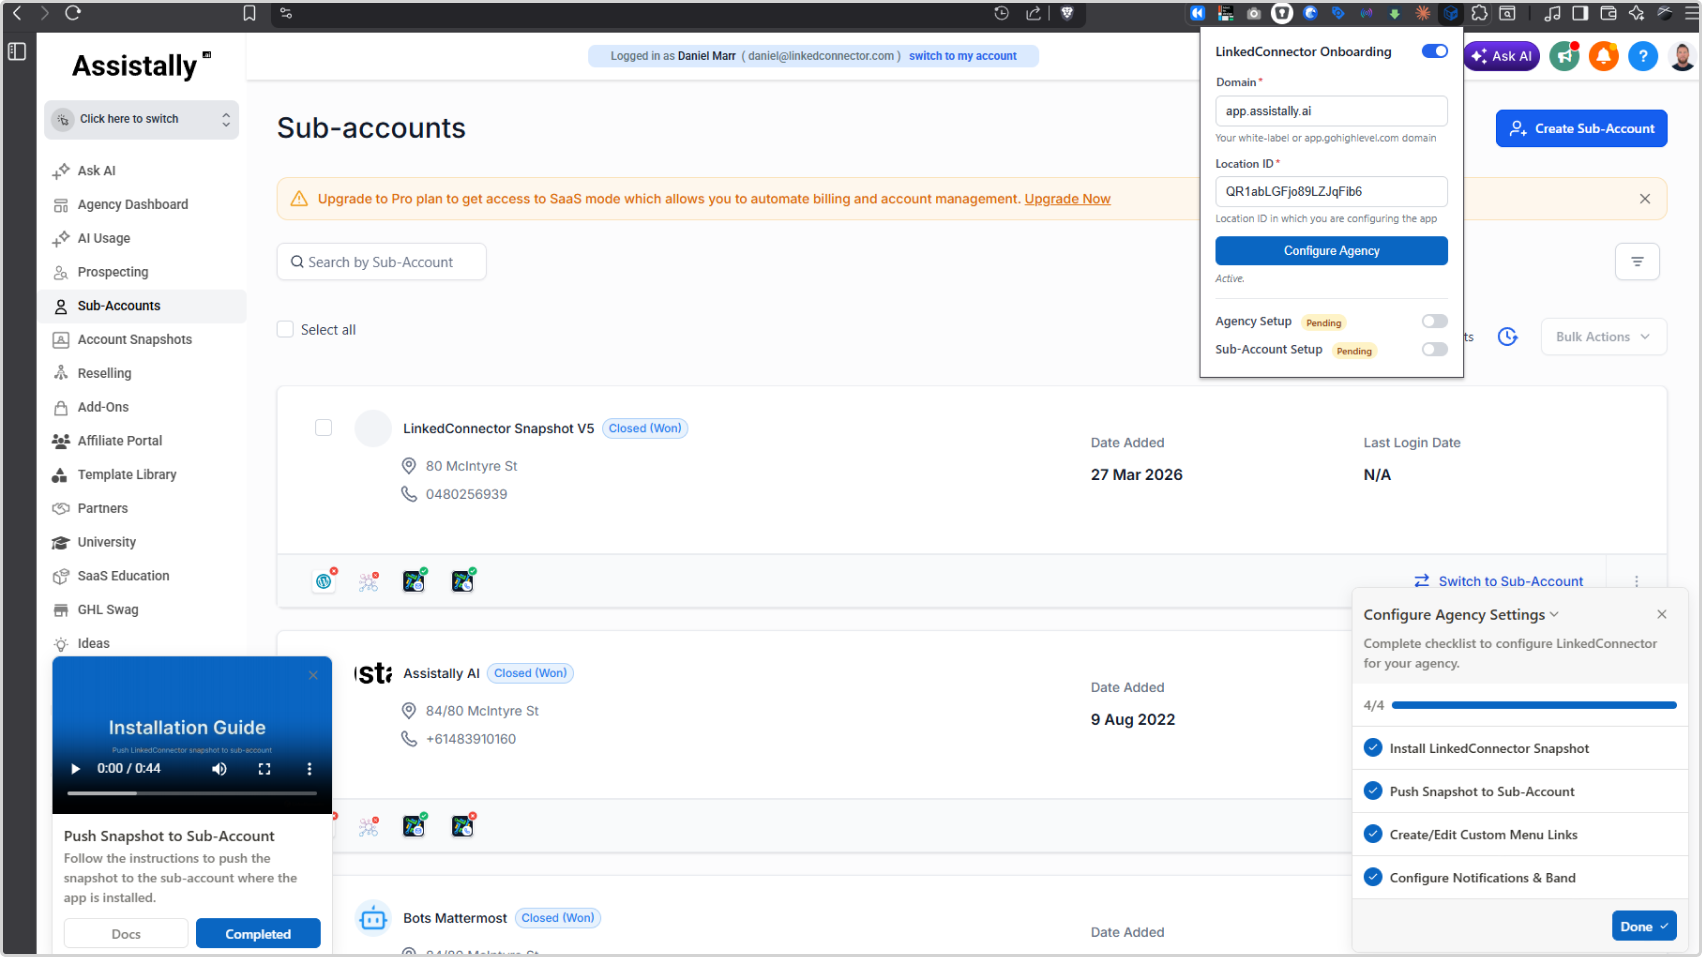
You will be redirected to your agency in LinkedConnector and a checklist will appear on the right side of the screen.
The agency checklist includes:
- Install LinkedConnector Snapshot
- Push Snapshot to Sub-Account
- Create/Edit Custom Menu Links
- Configure Notifications & Band
For each item:
- Click the checklist item to expand it
- Click View Instructions
- You will be redirected to the relevant page, where a video walkthrough and documentation links appear
- Complete the task
- Click Completed to mark the step as done and move to the next
Work through the list from top to bottom. The agency setup only needs to be completed once.
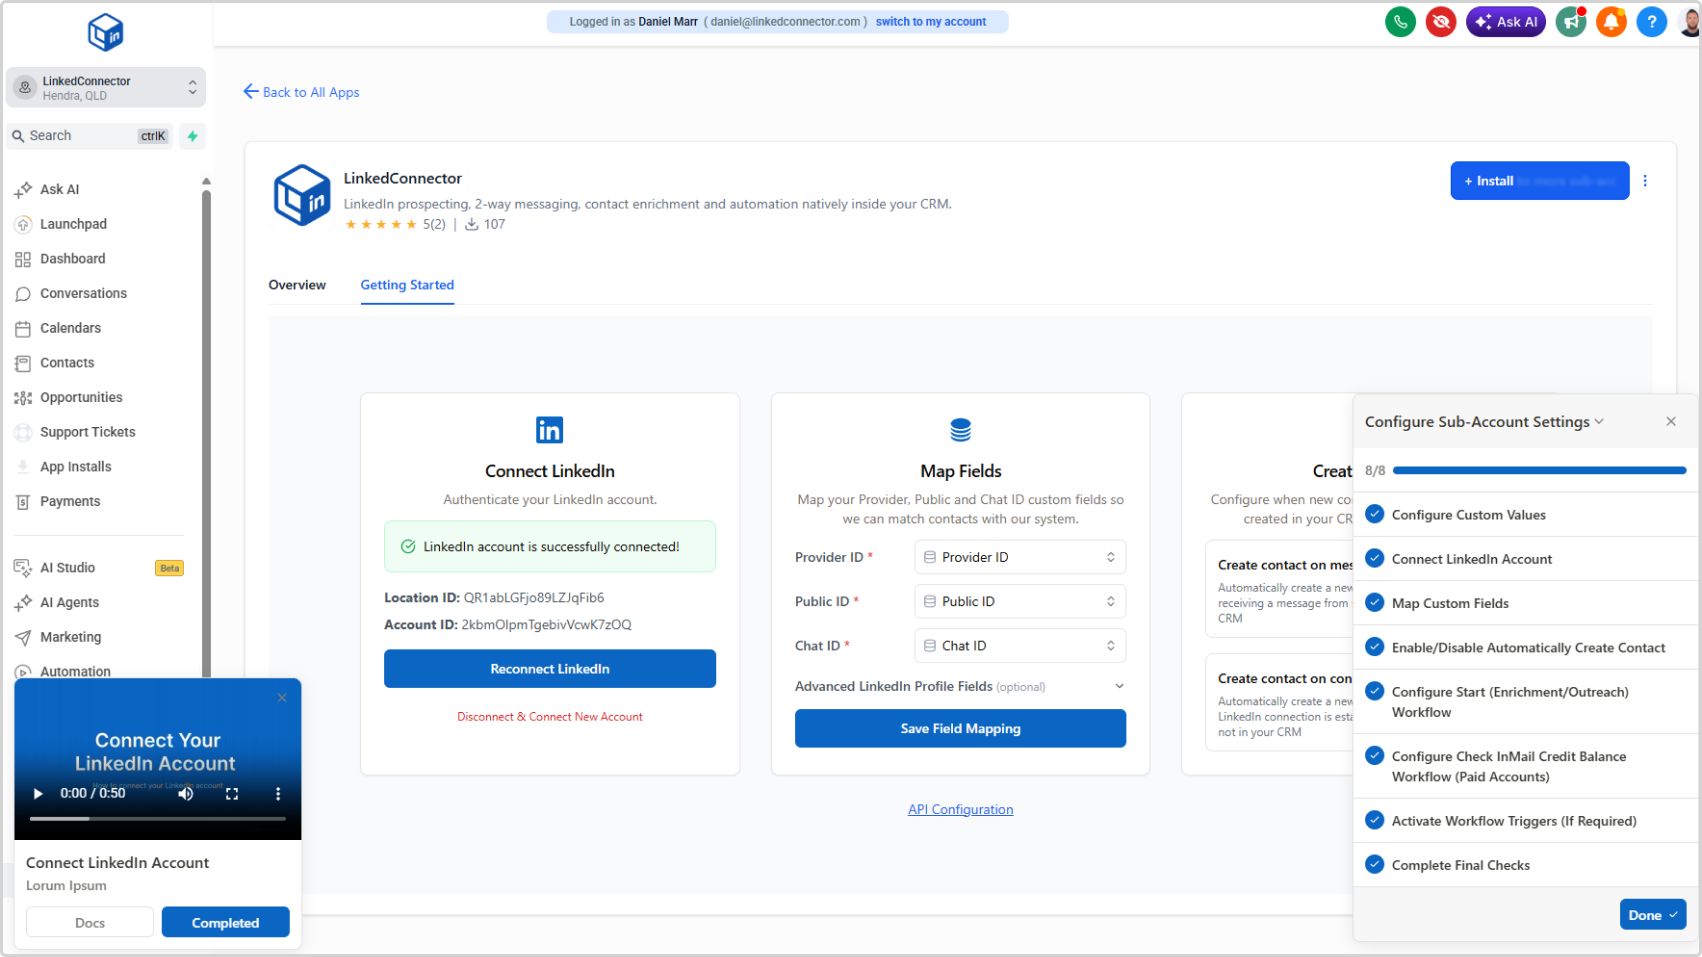
Step 4: Configure Your Sub-Account
Once the agency checklist is finished, the extension will show Configure Sub-Account as the next step.
Click Configure Sub-Account. You will be redirected to the relevant sub-account page and a new checklist will appear to guide you through the sub-account configuration.
Work through each item using the same process — click to expand, click View Instructions, complete the task, then click Completed.
Step 5: Add More Sub-Accounts
To configure an additional sub-account:
- Open the Chrome extension
- Replace the Location ID with the new sub-account's Location ID
- Click Configure Sub-Account
A fresh checklist will be generated for that sub-account. The agency setup does not need to be repeated — only the sub-account checklist is required for each additional sub-account.
Checking Your Progress
At the bottom of the extension you can see the status of each stage:
- Agency Setup — shows Pending until the agency checklist is complete
- Sub-Account Setup — shows Pending until the sub-account checklist is complete
Once a stage is finished, its status updates automatically.
Enable or Disable the Extension
Use the toggle at the top of the extension to enable or disable it at any time. When disabled, the onboarding checklists will not appear until you turn it back on.