Configure Start (Enrichment/Outreach) Workflow
Set up your connection request message and timing rules before launching the LinkedIn Outreach workflow.
You're configuring how the LinkedIn Outreach workflow sends initial connection requests. This involves setting the post engagement threshold, optionally adding a personalized message (Premium users), and disabling timeouts if needed.
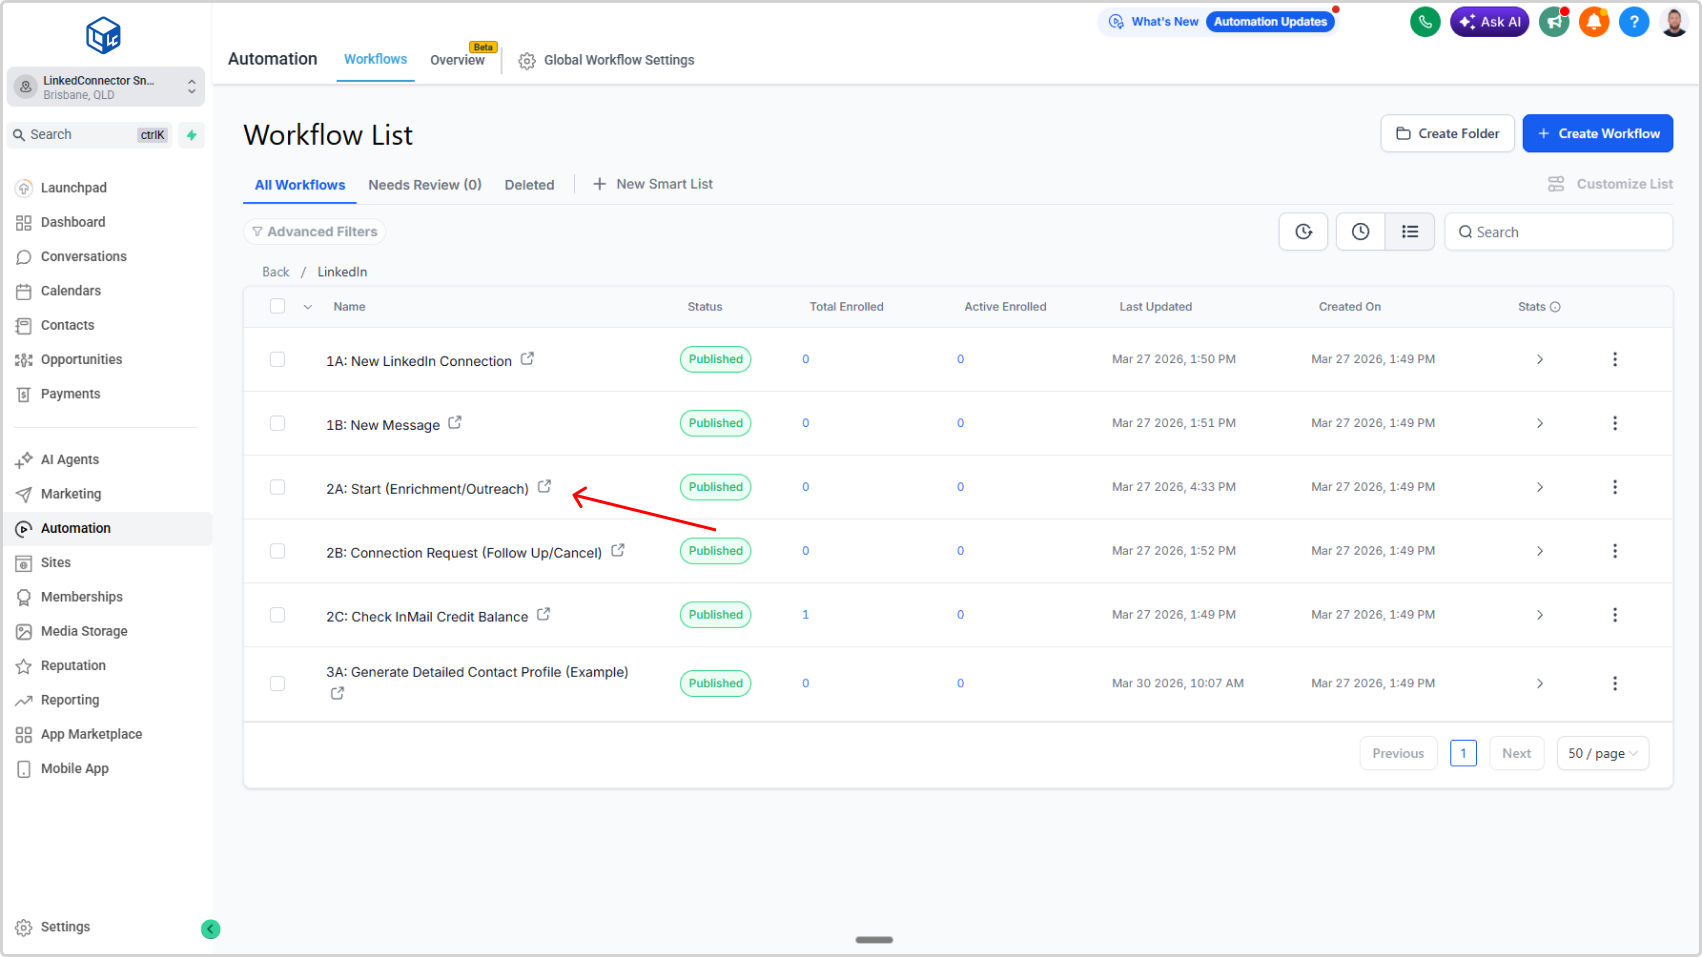
Open the Workflow
- In your subaccount, left sidebar → Automations
- Click LinkedIn folder
- Select 2A: Start (Enrichment/Outreach)
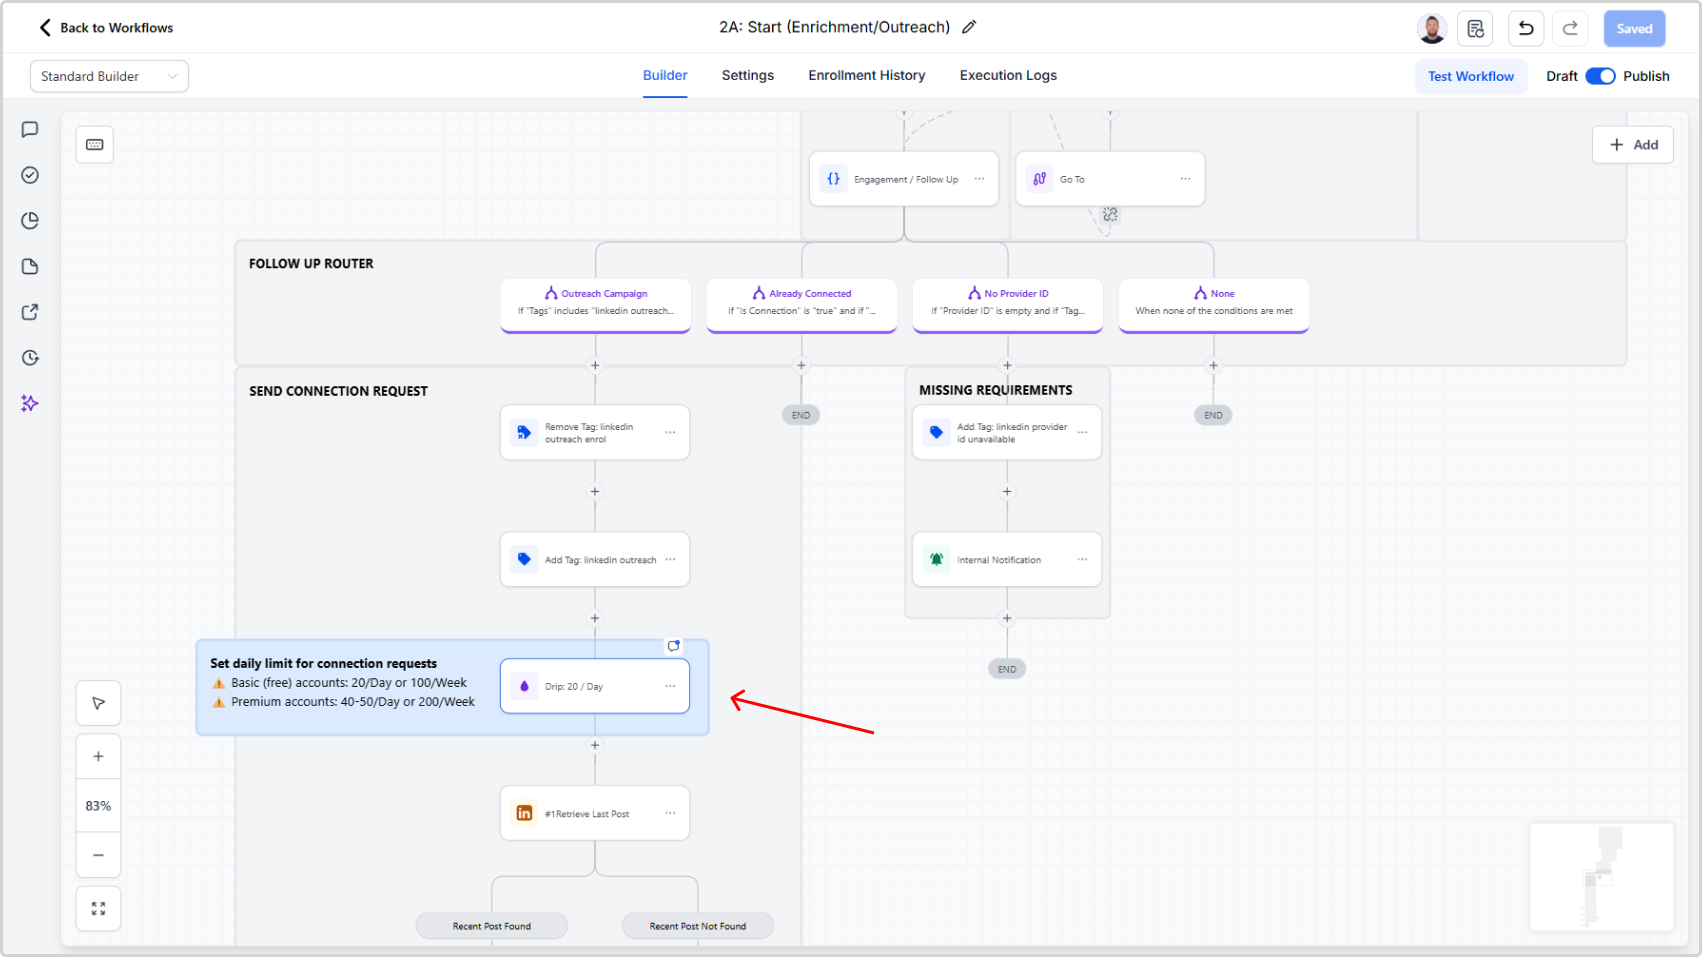
Set Rate Limits
- Set the daily rate limit for LinkedIn profile Retrievals.
Basic or Free LinkedIn accounts should be set to 80 a day x 5 days or a maximum of 400 per week.
Premium LinkedIn accounts should be set to 100 a day x 5 days or a maximum of 500 per week.
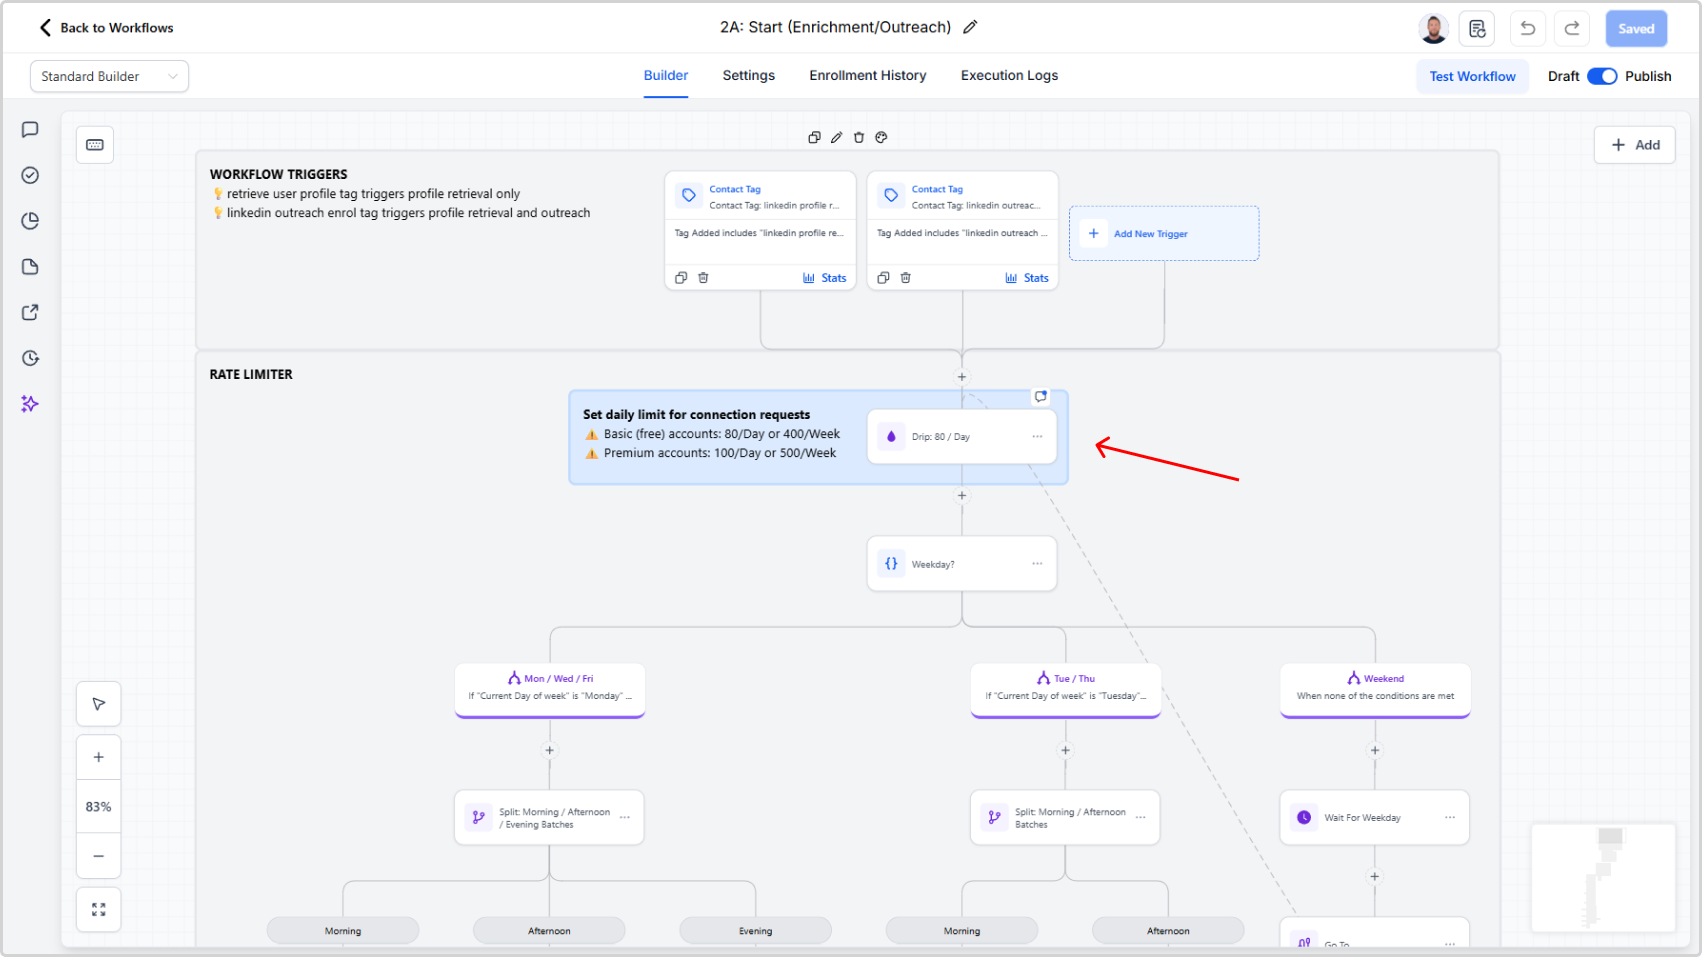
- Set the daily rate limit for LinkedIn connection requests
Basic or Free LinkedIn accounts should be set to 20 a day x 5 days or a maximum of 100 per week.
Premium LinkedIn accounts should be set to 40 a day x 5 days or a maximum of 200 per week.
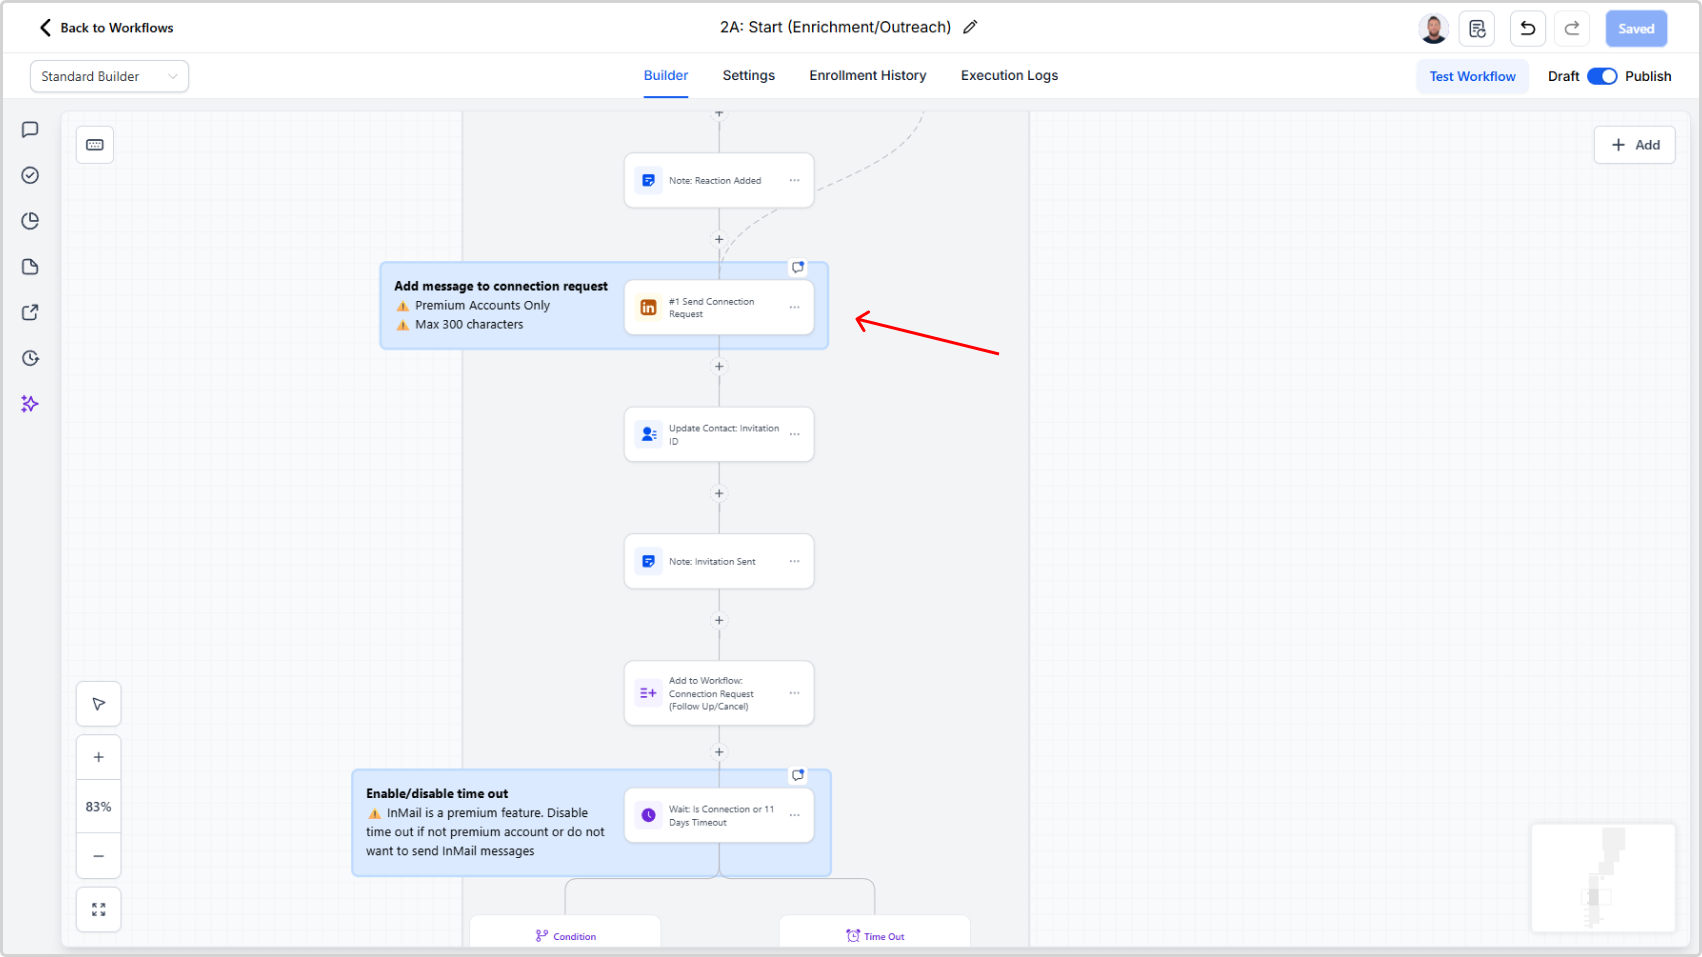
Configure Connection Message (Premium Users Only)
- Set your connection request message
- Keep under 300 characters (hard limit — account for variable expansion like {{firstName}} being replace by the actual value)
The contact will receive this message along with your connection request.
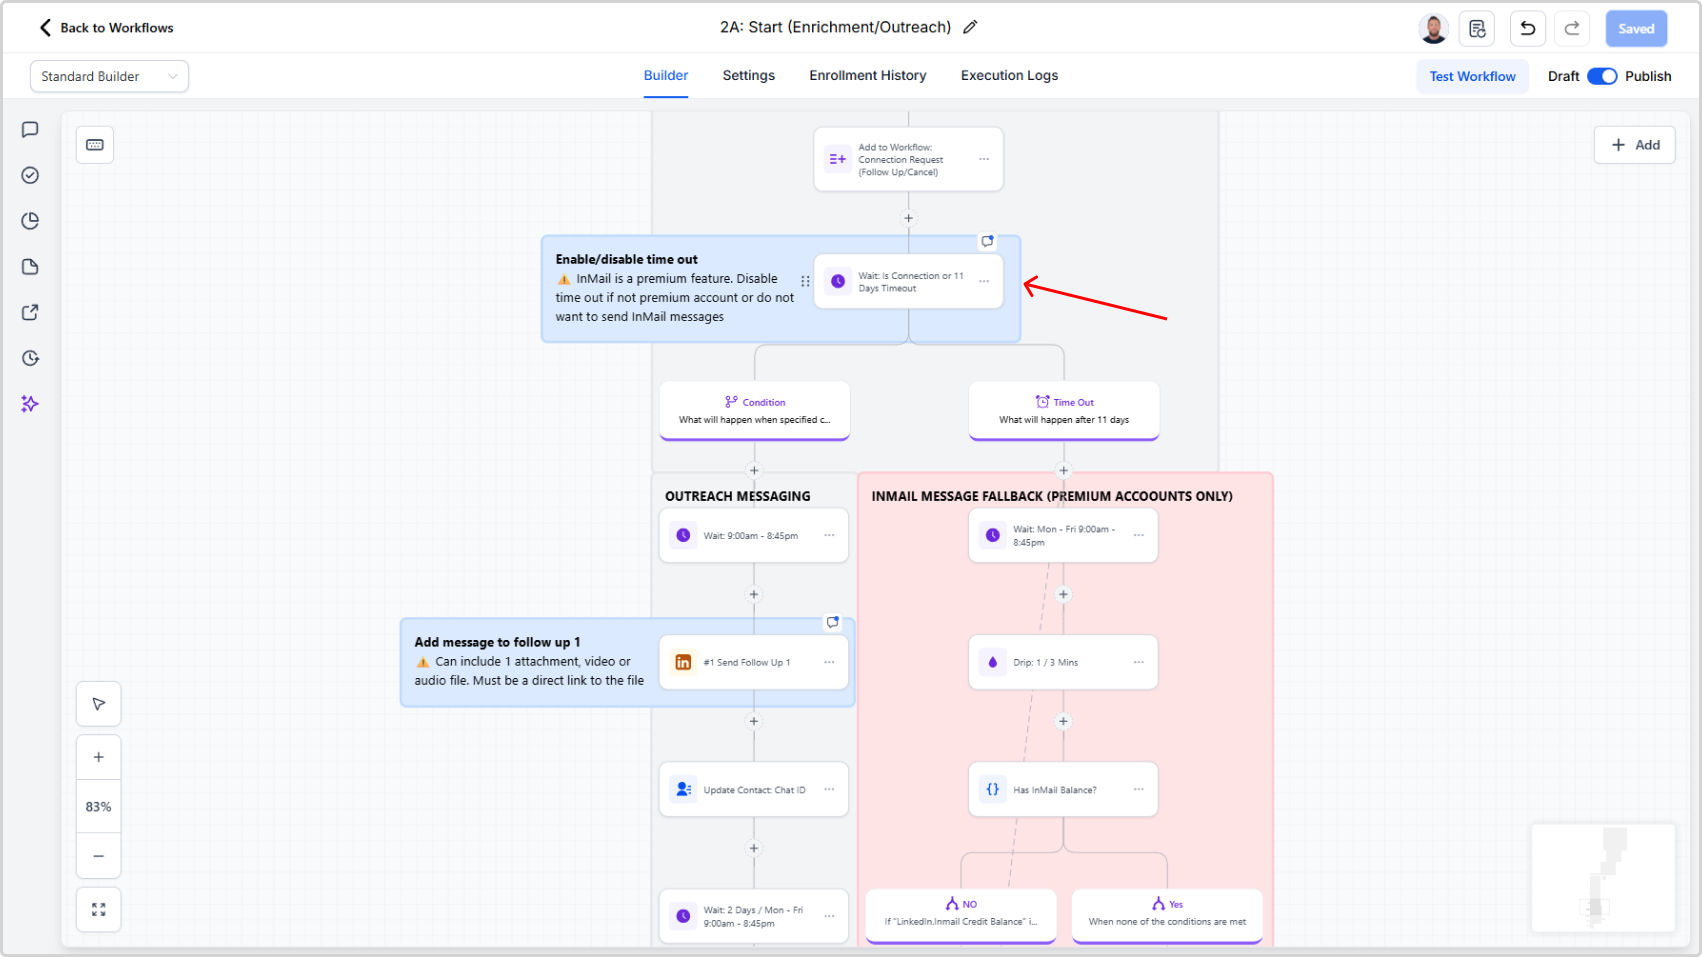
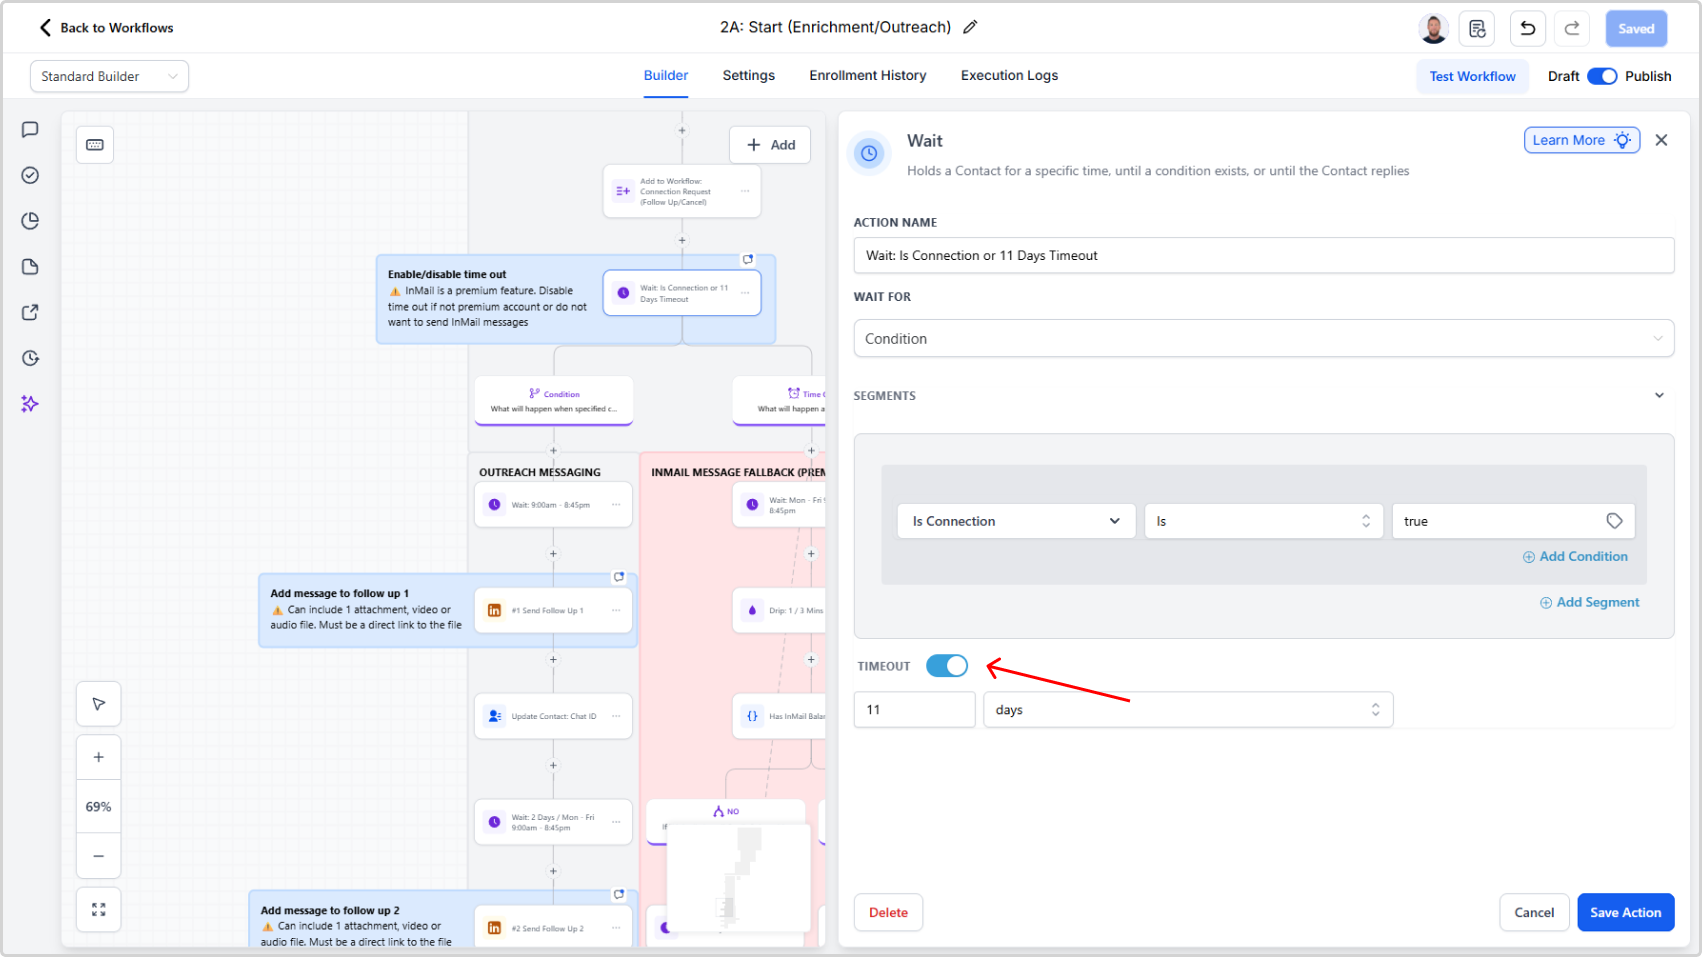
Disable Timeout (If you are a Basic LinkedIn user or not intending to use InMail)
- Locate the wait action "Wait for Connection or [x] Days Timeout"
- Click it and disable the timeout
Update Your Follow-Up Messages
Look for the workflow steps labeled Send Message 1, Send Message 2, etc. These are your follow-up messages.
For each follow-up message:
- Click on the Send Follow Up [X] step
- In the right panel, you'll see a text field with the current message
- Replace the "ADD MESSAGE HERE" with your own follow-up text
Tips for follow-up messages:
- Keep them short (2-3 sentences)
- Reference something from your previous message
- Make it conversational, not salesy
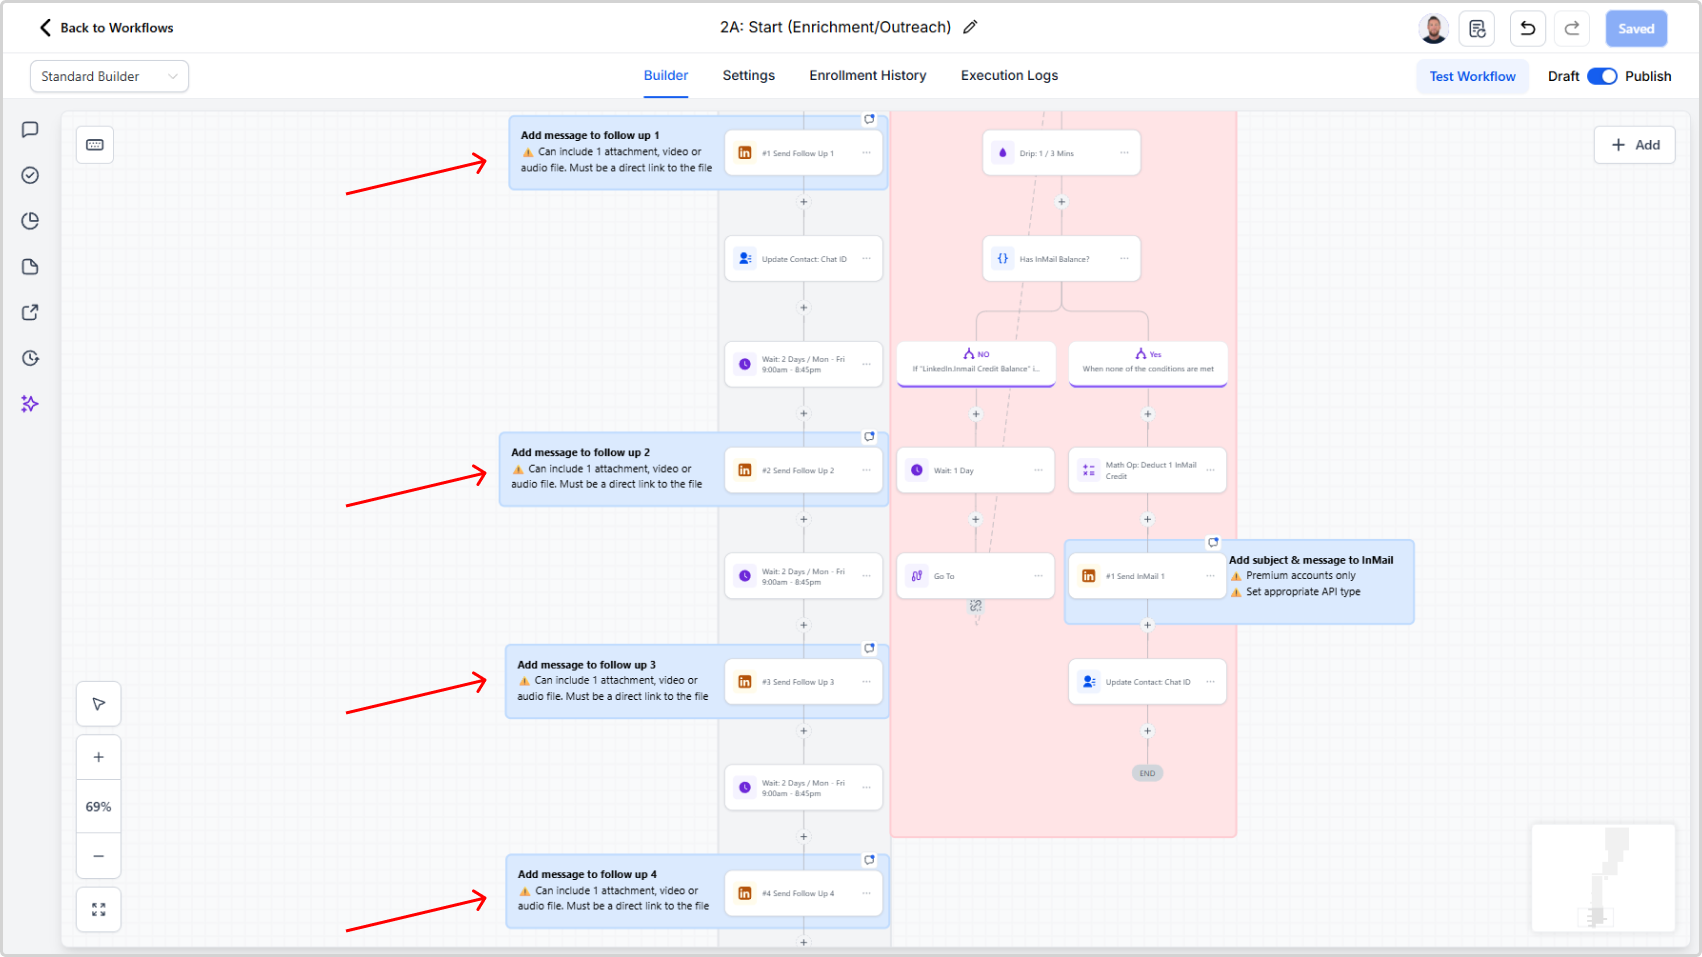
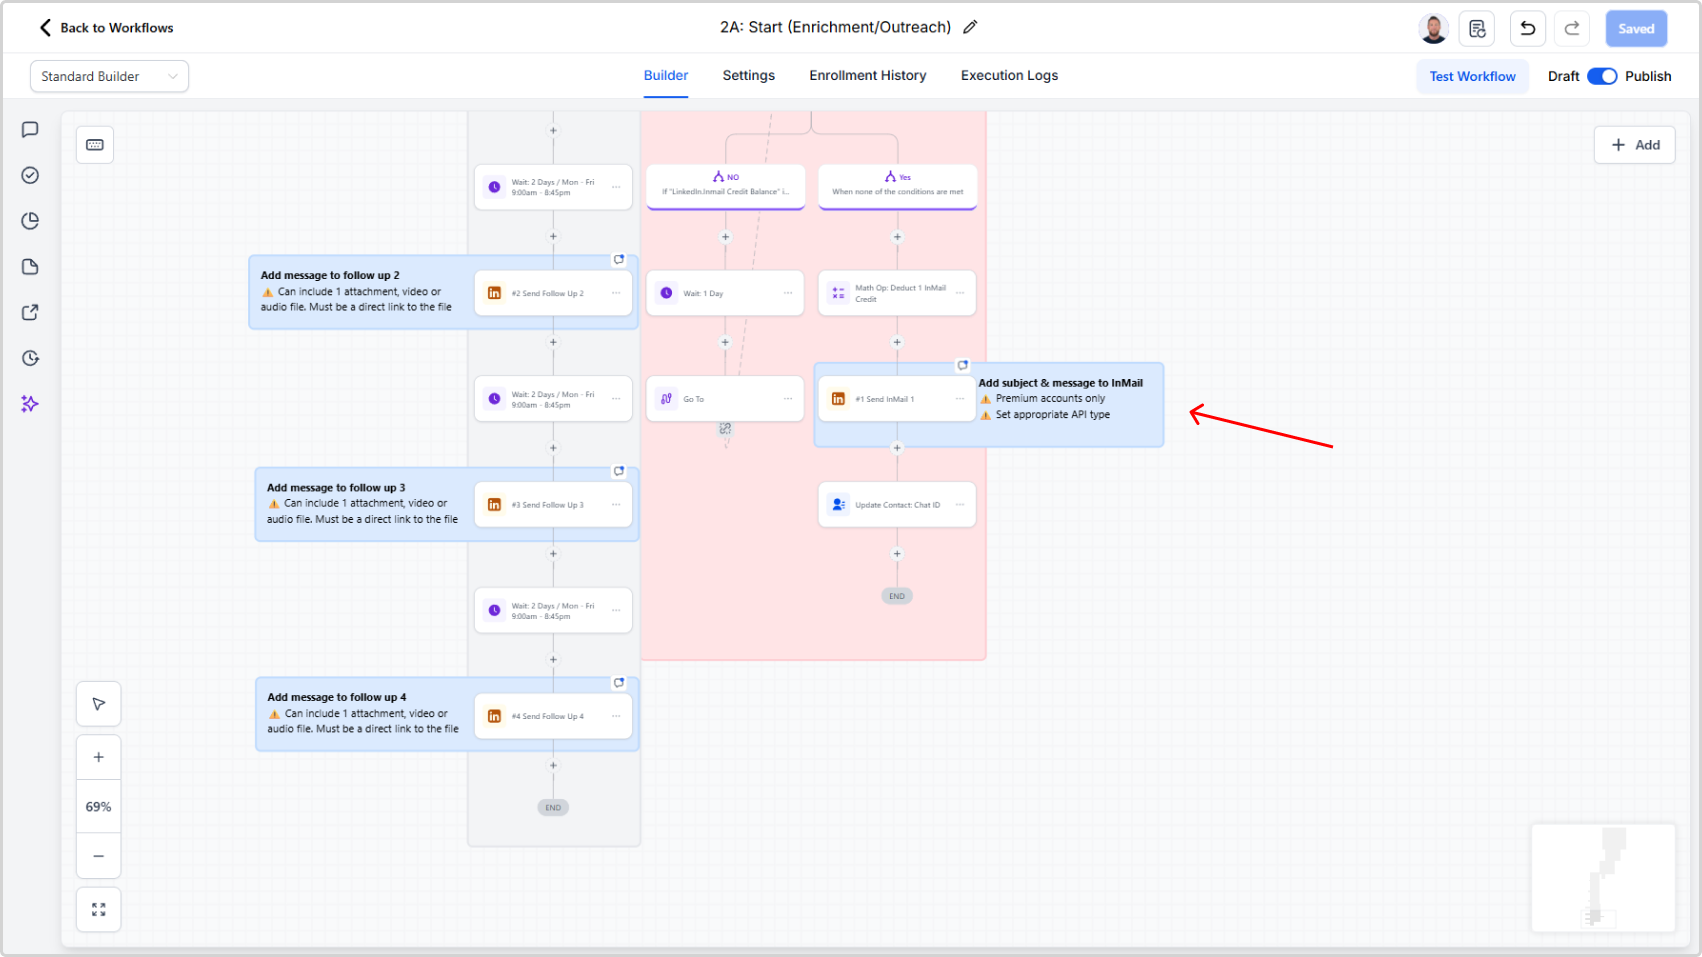
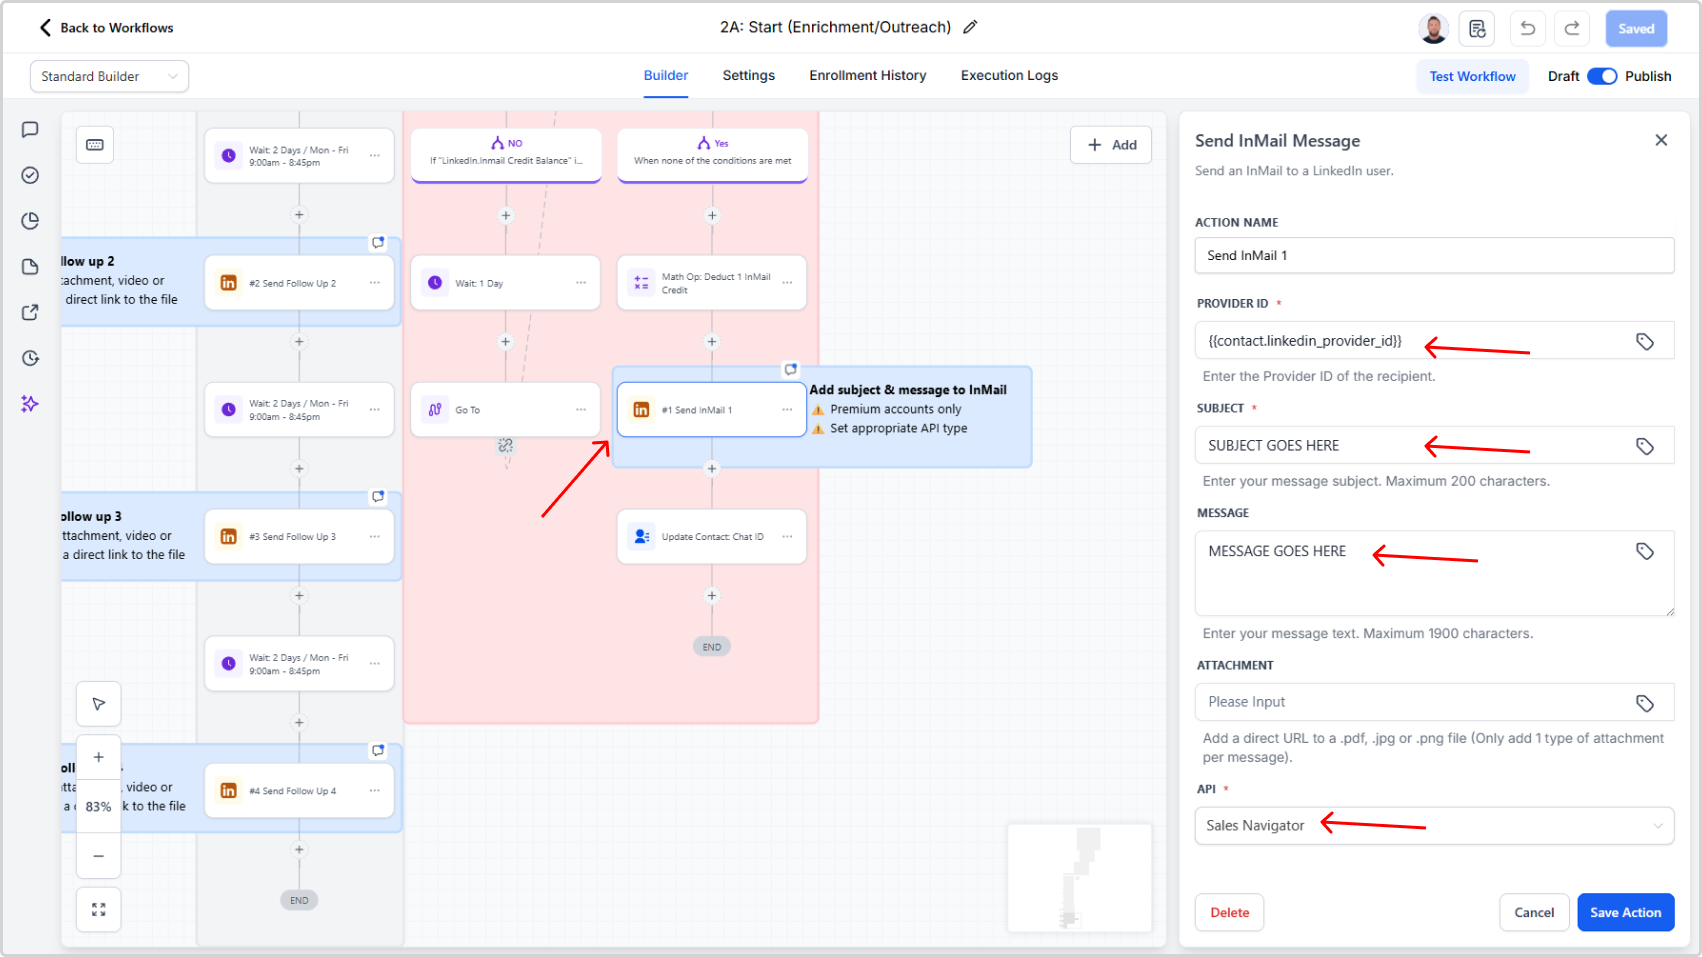
Configure Your InMail Message
- Locate the action "Send InMail 1" and click it to open configuration
- Enter your InMail subject line
- Enter your InMail message body
- Select the appropriate API type:
- Premium → Classic API
- Sales Navigator → Sales Navigator API
- Recruiter → Recruiter API