Map Custom Fields
Connect your CRM's custom fields so LinkedConnector can match LinkedIn activity to the right contacts.
Before LinkedConnector can find and update contacts in your CRM, you need to tell it which fields store LinkedIn profile information. These three fields act as bridges between LinkedIn and your CRM — without them, key features like duplicate detection and messaging won't work. This takes 2 minutes.
What These Fields Do
When you map these fields correctly, LinkedConnector can:
- Find existing contacts — When a message arrives, LinkedConnector looks up the contact by their LinkedIn Provider ID
- Create contacts with complete data — New LinkedIn contacts get their LinkedIn IDs stored in your CRM
- Detect duplicates — When importing LinkedIn prospects, LinkedConnector spots duplicates which prevents re-importing the same person
If you skip this step, these features won't work, and you'll lose visibility into who's who between LinkedIn and your CRM.
Before You Start
Ask your CRM admin or yourself: What are the field keys in your CRM for LinkedIn Provider ID, LinkedIn Public ID, and LinkedIn Chat ID?
If you're using the LinkedConnector snapshot, these fields are already created in your CRM. Check your CRM settings or ask your admin for the exact field names (they'll look like: contact.linkedin_provider_id).
Step 1: Navigate to the Getting Started Tab
In your LinkedConnector sub-account, in the left sidebar menu:
- Click App Marketplace
- Click Installed Apps
- Click LinkedConnector
- Click the Getting Started tab at the top
You'll now see several connection cards on this page.
Step 2: Locate the Map Fields Card
- Find the Map Fields card (same page as your Connect LinkedIn card)
- You'll see three empty text input fields

Step 3: Enter Your LinkedIn Field Keys
- In the first field, paste your LinkedIn Provider ID field key (example:
contact.linkedin_provider_id) - In the second field, paste your LinkedIn Public ID field key (example:
contact.linkedin_public_id) - In the third field, paste your LinkedIn Chat ID field key (example:
contact.linkedin_chat_id) - Click the blue Map Fields button
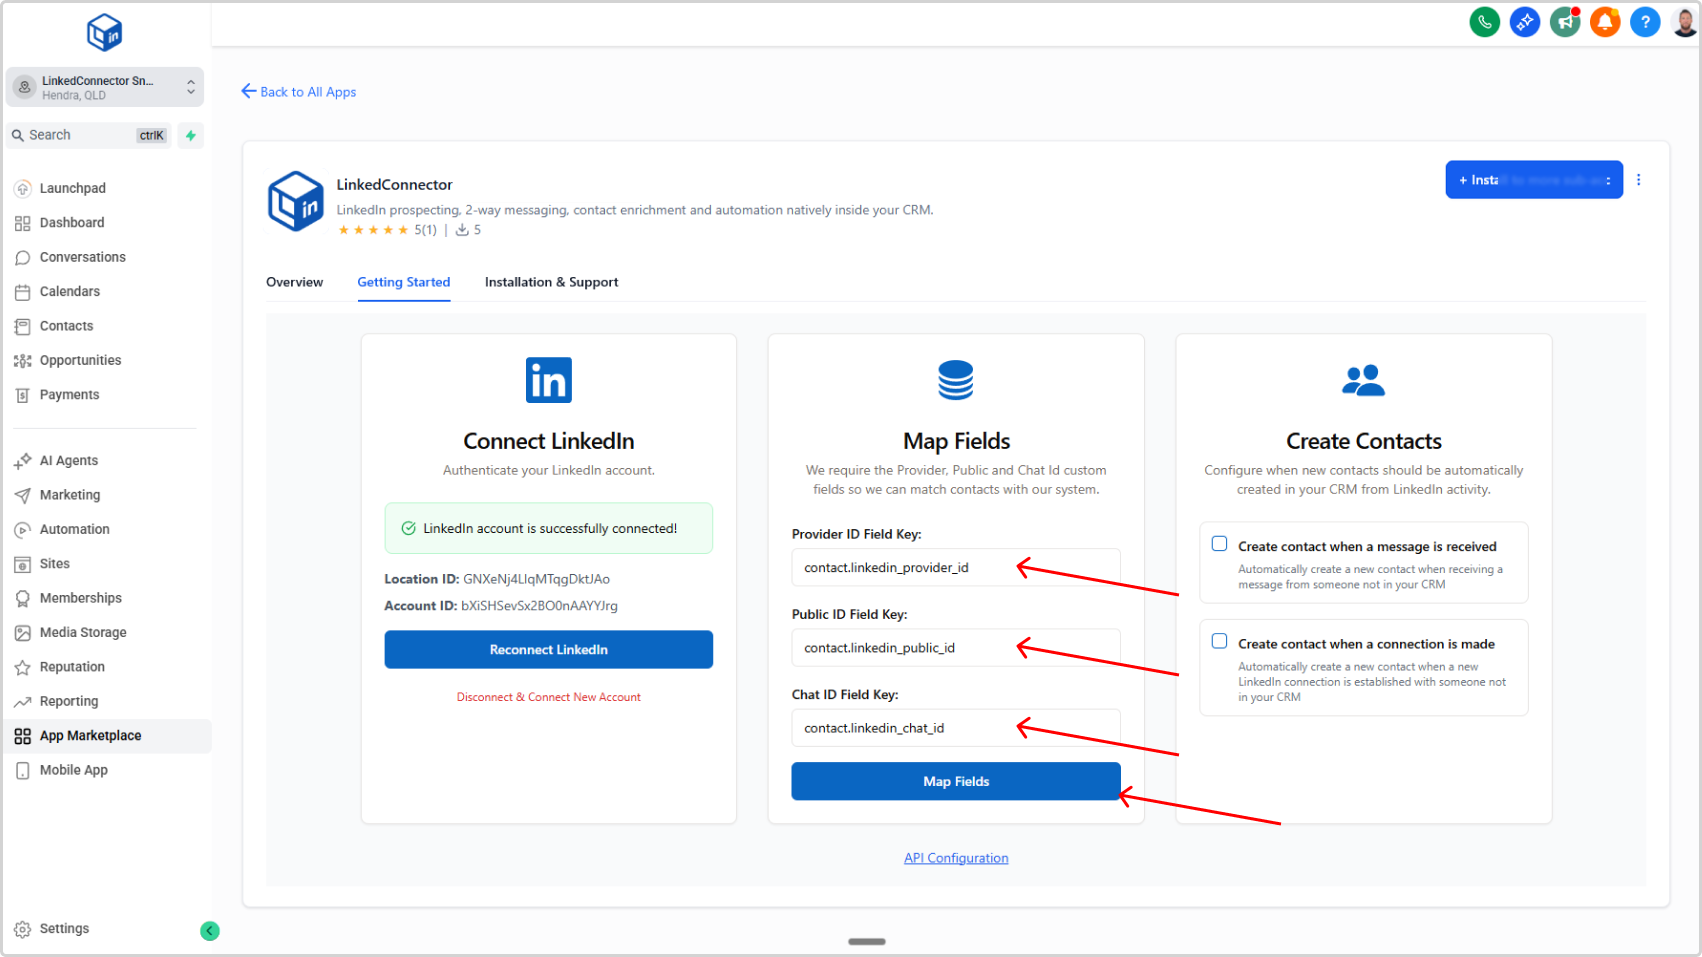
A green confirmation message will appear: "Field IDs have been mapped successfully!"

Troubleshooting
Error: "Invalid field key"
- Check that you've copy-pasted the exact field name from your CRM (capitalization matters)
- Verify the fields exist in your CRM (ask your admin if unsure)
- Try again with the correct field key
No confirmation message after clicking Map Fields
- Make sure all three fields are filled in (don't leave any blank)
- Check that field keys are pasted correctly
- Click Map Fields again