Configure Custom Values for LinkedIn
Set up your CRM domain, notification emails, and optional LinkedIn features in your sub-account settings.
Before the LinkedConnector Snapshot can work correctly, you need to configure a few custom values that tell the system how to function for your particular account type.
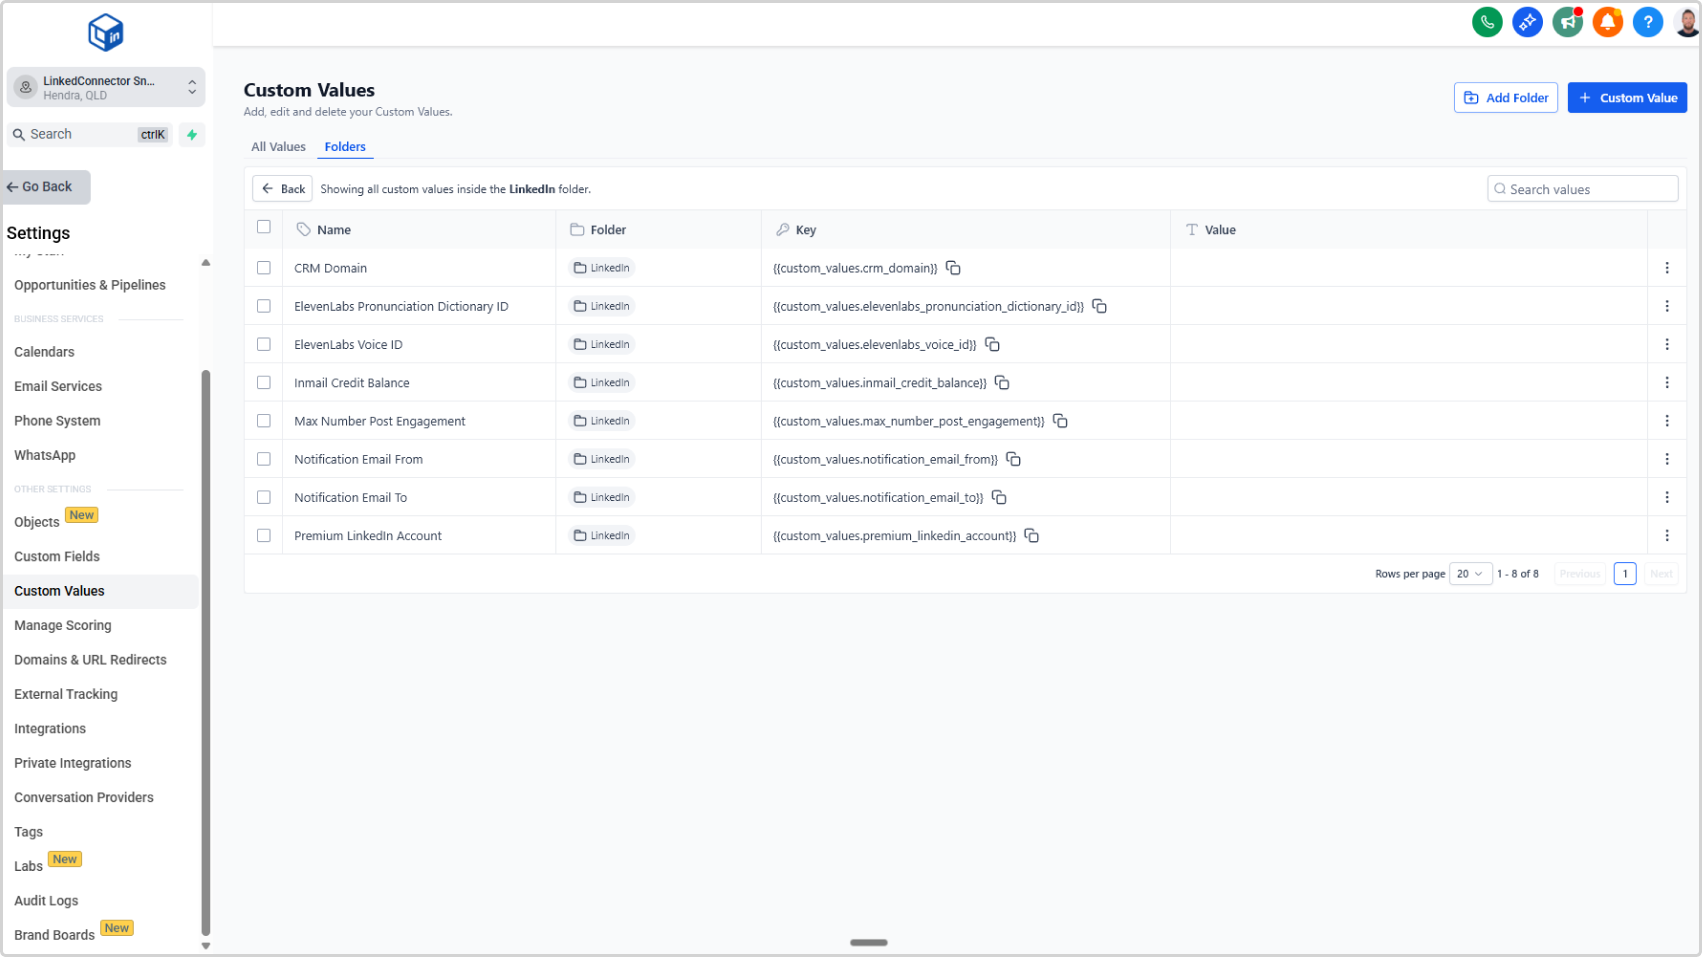
Where to Find Custom Values
- Go to Sub-account Settings (left sidebar)
- Click Custom Values
- Locate the LinkedIn folder
- You'll see all the fields listed below
Required Fields
CRM Domain
What it is: Your CRM's web address is.
How to find it: Look at the URL in your browser when you're logged into your CRM. Copy everything between https:// and the first /.
Example: If your CRM URL is https://app.yourdomain.com/home, enter app.yourdomain.com
What to enter:
- Enter your domain name exactly as it appears in your CRM URL
- Do NOT include
https://or trailing/
InMail Credit Balance
When to use: If you're using InMail features and want LinkedConnector to track your credit usage.
What it is: Your starting InMail credit count. LinkedConnector will use this as a baseline.
What to enter:
- Start with
0(zero) as your baseline
Max Number Post Engagement
When to use: If you want LinkedConnector to engage on posts (like, comment, share) before sending a connection request.
What it is: How many posts you want LinkedConnector to engage on per contact.
What to enter:
- Enter a number (e.g.,
2or3) - This means LinkedConnector will engage on up to X posts from that contact before sending a connection request
Leave blank if: You don't want post engagement enabled.
Notification Email From
What it is: The email address that workflows will use when sending you failed-search notifications.
What to enter:
- Enter an email address from your organization (e.g.,
automation@company.com) - This should be a monitored mailbox where you want system notifications to come from
Notification Email To
What it is: The email address where you want to receive notifications about failed searches or system issues.
What to enter:
- Enter your personal email or team email that monitors alerts
- This is where workflows will send notifications
Premium LinkedIn Account
What it is: Whether you're using a standard LinkedIn account or a premium account type.
Options:
true— You have Premium, Sales Navigator, or Recruiterfalse— You have a standard LinkedIn account
What to enter:
- Type
trueorfalse(lowercase, no quotes)
Optional Fields
These fields are only needed if you're using specific LinkedConnector features. If you're not using these features, you can leave them blank.
ElevenLabs Voice ID
When to use: If you're using AI-generated voice messages in your workflows.
What it is: The voice identifier from your ElevenLabs account. Tells LinkedConnector which voice to use when generating messages.
How to find it: Log into your ElevenLabs account → Voices → Copy the Voice ID of the voice you want to use.
What to enter:
- Paste your ElevenLabs Voice ID exactly as shown in your account
Leave blank if: You're not using voice message features.
ElevenLabs Pronunciation Dictionary ID
When to use: If you're using AI-generated voice messages and want to customize how certain words are pronounced.
What it is: Custom pronunciation rules from ElevenLabs that adjust how words sound in generated audio.
What to enter:
- You can add up to three IDs
- Separate multiple IDs with commas (e.g.,
id1,id2,id3) - Copy IDs from your ElevenLabs account
Leave blank if: You're not using voice messages or don't need custom pronunciation.